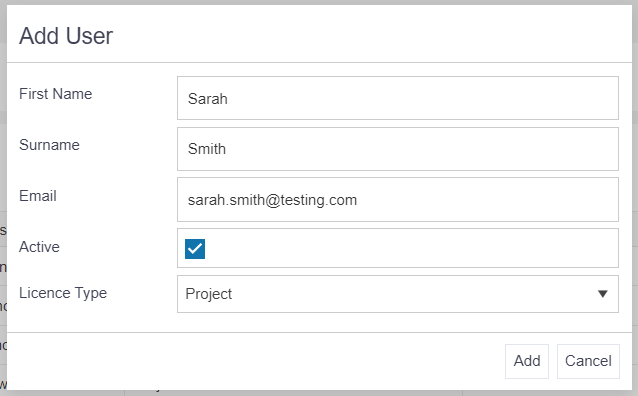
Add a user
To add a new user, click the Administration Cog > Manage Users > Add. Enter the following mandatory information:
- First Name.
- Surname.
- A valid and unique email address.
- Select licence type - Project or Workspace
- Click Add.
The new user account is automatically created and will be displayed on the screen. The user access will default to Active. Inactive users cannot log in but can still be added to projects and receive outputs.
Top Tips
- Always ensure that the email notifications and user select boxes are ticked.
- A Workspace user can be added to projects in a read only capacity.
Review the form and when happy, click Actions > Send Welcome Message. Then Close.
User account form explained
The user account form has a number of options available, the core elements are as follows:
- Email Address – this is the email address that the system generated emails will be sent to and must be unique. This is a mandatory field when adding a new user.
- Licence Type - select from Workspace or Project
- Active – this is a mandatory field and will default to ticked when adding a new user. Untick to remove access.
- Email Notifications – tick this box to ensure active users receive all system generated notifications. Un-tick this box for inactive users.
- Access to All Reports – if ticked the user will see all reports and data specific to their permissions.
- User Select – tick this box to ensure the user’s name appears when searched for across the system.
-
Manage Users - tick this box to enable the user to manage other users.
Actions menu
There are a number of actions that can be selected from the actions menu. The core elements are as follows:
- Change Email Address - can be use if the user email address has changed.
- Reset Password – If a user forgets their password, this can be reset by clicking Reset Password. A new temporary password will be sent to the user which will need to be changed when they log back into Verto.
- Send Welcome Message – This will be sent to a new user and inform them of their temporary password.
- Unlock User – If the user makes five unsuccessful log-on attempts their profile will be locked. Clicking Unlock User will allow them access to Verto using their existing password.
Watch this video to find out more:
Review existing users
To find an existing user select the Administration Cog > Manage Users and use the filter funnels to search. From here you can either click Edit to access their user profile or click on the downward arrow to display a pop-up of all the projects that they have an involvement with.
To find out how many licences you are using you can select Licences.
Remember
- It is not possible to delete users from the system as these records must remain for audit purposes. Therefore, when a user no longer requires access to Verto you should untick the active checkbox, email notifications checkbox and the user select checkbox.